Posts tonen met het label Recipe. Alle posts tonen

dinsdag 3 juni 2014

King of the Summer Salad

Hello there! Welcome to summer!
Almost. Almost welcome to summer!

Summer captured in 4 pictures (including my post-running face)


The weather is not always agreeing, if I would have written this blog post last week you probably would have declared me crazy. Even though it is not extremely sunny today, it is still hot, humid and sticky, which equals to a true Dutch summer if you ask me! Luckily enough there have been enough sunny days to have the amount of strawberries exponentially increase in the shops (for reasonable prices, locally grown).

So when I say strawberries, you say:
CREAM
CAKE
DESERT
and CHOCOLATE

but I say:
SALAD!

Say what? Say salad! In a month I'm going on a holiday to Tuscany (in Italy, obviously) and even though I'm moderately happy with my body when I'm clothed, I'm not too confident while wearing a bikini... Expecting me to diet is a very unrealistic thought. I like to run, so I try to do that a bit more often, and to be a bit more active overall, but I like food too much to be seriously cutting back on that department.

I really do think you can have it both ways though... it is all in choosing overall healthy ingredients that taste great and keep you fully nourished so you won't feel the need to snack throughout the day! That is what this salad will do for you. I've had the basic salad years earlier for the first time, but I stumbled across another version of it on the blog called gimmesomeoven, if you click the link it'll take you to the original recipe.

However, I found that the original recipe was not really a full meal... I had it for dinner with nothing on the side yesterday and I was so hungry the rest of the evening I actually stole some of my boyfriends food off of his plate *naughty*. I had so many of the ingredients left over today I thought I'd give it another try, but this time I added some bits and pieces that did make it a full evening meal. So here it goes, I hope you'll like it!

King of the Summer Salad


Goats cheese & bacon, Summer on a plate


Ingredients (for 1 serving):
50 grams of pasta like orecchiette
2 large handfuls of baby Spinach
3 large strawberries cut into little pieces
half an avocado cut into pieces
half a red union, thinly sliced
2 rashes of bacon
soft goats cheese
1 teaspoon oregano
a bit of honey
poppy seed dressing

Poppyseed dressing
Ingredients (for 1 serving):
1 tablespoon of lemon juice
1 teaspoon of honey
half a teaspoon of mustard
pepper & salt to taste
1 teaspoon of poppy-seeds

To start I turned on the oven, my oven does not really have settings... but I put it on medium heat. I took the bacon and cut the rashes in half. Then I put 1 teaspoon of goats cheese on each half of the rashes of bacon, added a drop of honey and sprinkled some oregano on top. Then I folded the bacon over the cheese until it was completely covered. I baked these parcels of love on a sheet of baking paper for about 15 minutes in the oven. The cheese will probably seep out a bit, but that honestly doesn't matter.

I boiled some water, added some salt and boiled the pasta. You might think that this amount of pasta is not enough, but don't forget you're adding a complete salad to this... it is only to bulk it up a bit! Once it is cooked (after 10 minutes or so) you rinse them under cold water.

I then assembled the salad, which really is the most difficult task of this recipe because you have to toss everything on a plate and make it look artistic. You then mix up the dressing, which possibly is even harder than the salad because you have to put all of the ingredients in a small bowl and mix it up... Add your dressing to the salad and put the goats cheese/bacon treats cut into little pieces on top!

The strawberries and poppy-seeds really need to be the heroes of this dish, so before you add the dressing make sure it is not to sour, and don't get tempted to add more bacon to this dish, you won't need it!

Give it a try and let me know what you think! You can leave me a comment below this article, or follow my facebook page, instagram or twitter, I'd love to hear what you think!

Lots of love,
Floor

woensdag 14 mei 2014

Procrastination (a.k.a. rhubarb muffins)

Hey! Happy Wednesday!

It's been a while since we talked! Or actually since I talked. But really just wrote. And you read. Anyways, I had things to do, so obviously I decided it was time to bake again haha.

Lately I've been obsessed with rhubarb, and for the non-foodies amongst us I'll get into Jamie Oliver mode: "What is up with these kids nowadays, they can hardly recognize a potato! Rhubarb is a plant with long stalks that are green at the tips and bright red at the bottom, uncooked it is really crunchy and sour but when cooked they get really soft and silky and they are really good in savory recipes as well as baked goods.

I saw those bright red stalks in the shops last week and suddenly was craving a rhubarb and apple crumble. I had some of the apple-rhubarb mixture left over and I've been eating it for almost a week for breakfast with some yoghurt and muesli! So good! Then this morning, I had the last little leftover and I hurried to the shops and buy some more. This time no crumble however, too mainstream for me. I wanted to make rhubarb muffins but for some reason I couldn't find any recipes on the interwebs that sounded good enough?! In the end I decided to modify a banana and cinnamon recipe that I found in one of my cookbooks, and I was so pleased with the result I decided I couldn't keep it to myself.

So here you go: My rhubarb banana and cinnamon muffins


Ingredients: 
400g of Rhubarb 
5 tbs of sugar

350g of flour
3/4 tsp of salt
1 1/2 tsp of baking powder
1/2 tsp of bicarbonate of soda (baking soda)
2 tsp of ground cinnamon
160g of caster sugar 
375 ml of buttermilk (Or 375 ml of milk with two tbs of lemon juice)
1 egg
1/2 tsp of vanilla extract
70g of unsalted butter
1 banana, peeled and mashed

1. Cut the rhubarb into small pieces, add them to a pan with the 5 tbs of sugar. Let it cook down until you are left with a jammy mixture that is slightly sweet but mostly tart

2. Preheat your oven to 170C 

3. Mix all of your dry ingredients together (the flour, sugar, salt, baking powder, baking soda and cinnamon) 

4. Mix the buttermilk (or your milk mixture) with a beaten egg and the vanilla. Add this to your dry ingredients and stir with a wooden spoon until just combined

5. Melt your butter and add together with the mashed banana to the mixture, mix again with the wooden spoon until evenly dispersed

6. Spoon the mixture into muffin cases in a muffin tin. On top of each muffin add a tsp of the rhubarb mixture

7. Put it into the oven for 20 to 30 minutes, this really depends on the size of your muffin tins, mine were really small so they were done really quickly. I covered them with tin foil for the last 3 minutes to stop them from browning

This really are the best muffins I've ever made, they are really fluffy, absolutely not dry and not overly sweet! I had them with a nice cup of green tea but once they are cooled down I think they are also very nice with some lemonade as that would complement the tartness and sweetness of the muffins! 

I'd love to hear what you think of this recipe, and whether you share my love for rhubarb! To what do you like to add rhubarb? Or do you prefer some other type of summer fruit in pastries? 

Thanks so much for reading, and I'll write to you soon ;)

lots of love,
Floor

dinsdag 18 maart 2014

Millionaire's Shortbread

Hey there! Happy Tuesday!

What's that? You've got a craving for chocolate, caramel AND cookies? 
You can't choose? Why would you, when there is such a wonderful thing as millionaire's shortbread?

A famous writer once wrote: 
"Everything in moderation, including moderation"- Oscar Wilde. 
And that is exactly what you should keep in mind when making and eating these delicious treats. You will have bowls that are covered with sticky caramel and melted chocolate that are impossible to get out, so you will feel the strong urge to clean everything with your finger and your tongue. I wouldn't discourage that, but do it in moderation, because you will be to nauseous to even try the shortbread when it's done! 

I made this last thursday with the 'Boyfriend', and he had a jar full of good quality salted caramel from a foody type of birchbox. We just baked the shortbread, spread the caramel on top when it was cooled down and added the chocolate. The recipe does not call for this but I did have some gluten-free flour lying around and we thought it would make the shortbread more crisp and flaky while at the same time we would limit the amount of gluten in the cookie, which for some people is a good thing! 

The result looks like this, and the ingredient list and recipe you can find below! 

Tiny treats, great for sharing (or not)

Millionaire's Shortbread

1 tin of condensed milk
150g of flour
100g of gluten-free flour
75g of white muscavado sugar 
300 g of flour
125g of sugar
200g of pure chocolate

Start with the caramel, I didn't make this myself but this recipe for caramel is fairly widespread so I think we can assume it will lead to the same kind of result! Of course if you can find a good quality caramel in your shop, you can totally go for that instead.

If you're making the caramel, put the tin of condensed milk covered in a pan with boiling water with a lid on top and boil it on low heat for three hours. Check every now and then whether the water level is still high enough, the tin should be totally covered! After three hours take it out of the pan and let it cool down for 30 minutes. Then melt 125g of the butter in a pan and add the sugar and let everything melt together. Add the caramelized condensed milk and let it warm up for 5 minutes. You can also add some sea salt to make it a salted caramel, the jar I used did have salt and the result was awesome!

Heat up the oven to 180 degrees C. Crumb the two types of flour and the rest of the butter (175g) together and add the white muscavado sugar. Kneed the crumbs together to a dough and press it down in your square baking pan lined with baking paper. With a fork make some little holes in the dough and bake it for 30 minutes in the middle of the oven until it's nice and brown and done. Let the shortbread cool down completely. 

On top of the cooled down shortbread spread your caramel and let it set for a little while. I put it in the freezer so it would set a bit faster and if you do that it only takes 10 minutes to set. While it's in the freezer, melt your chocolate au-bain-marie, and then spread the chocolate on top of the caramel. We also added some sea-salt flakes on top of the chocolate to give it an extra kick! Put it back in the freezer for 10 minutes and then you can take it out. 

Take the Millionaire's Shortbread out of the baking tin and cut it into small pieces. Again, everything in moderation, including moderation. That goes best if you cut it into small pieces, so you don't end up eating half the thing in half an hour and getting completely sick with all of that chocolate and caramel. 

So... good luck with that. I can't stop eating those things, it was a good thing I wasn't at home this weekend otherwise I would have eaten even more... But then again, I had more than enough treats this weekend, I was at my parents place I had so much good food once again! At least now I have some more little treats to get myself through the week haha! 

I'd love to hear your comments, whether you've tried to make them or any other recipe's for me to try! So do let me know how you get on! You can contact me through facebook, twitter, instagram or in the old fashioned way, through the comments below this post! 

Lots of love,
Floor


donderdag 13 maart 2014

Healthy Breakfast Favourites

Once again, it has been too long!

I hope you haven't been missing my blogs too much, as time dragged on I was getting more and more ashamed of not writing yet another day, which of course did not help my creative process... So before I get on with the main topic of this blog, a little update on what I have been up to!

I think it is about 2,5 weeks ago since I wrote my last blogpost, since then I have been to The Hague (twice), Breda, Utrecht, Maastricht, Amsterdam and Rotterdam. (As I'm writing this down I can hardly believe it actually... I didn't know I've been all over the Netherlands so much haha). I've been on excursions with ESN twice (to Amsterdam and the Hague), celebrated carnaval in Breda, spent some time in the sun in Maastricht, interview consultants in Rotterdam and went about with my daily life in Utrecht.

With some of my best friends in The Hague
Celebrating Carnaval with Joost <3
exploding fields of crocuses in The Hague

Ahhh the daily life, you probably will recognize this, the good times and the bad. Last week was one of those 'bad' times. I like some routine in my days and suddenly I was thrown out of my routine because of a lack of classes and other things. I was so grumpy all week long... So what I've been trying to do to improve my own mood is go for a run two times a week. Having these anchor points in my week (and in my days) help me so much to stay motivated. I push myself to go faster and further every time I run, and I know that when I get back I take a nice shower, have a proper lunch and then have more energy to get Uni-stuff done. It has improved my mood a lot!

Something else that improves my mood is my breakfasts. Going for a run twice a week has motivated me to have healthier breakfasts as well. The typical Dutch breakfast is a cheese sandwich or a sandwich with chocolate sprinkles or peanut butter and a glass of milk or coffee/tea. But as you can imagine, this is not the best breakfast you can give yourself to stay nourished and full all morning. I started putting more effort in my breakfast and taking a bit more time to prepare something healthy, so here I have two healthy options for you to try if you are looking for some new breakfast ideas!

My first option is best for the colder days: Oatmeal!
I don't think I've ever had this as a child... But I love it now and I think it would be very suitable for children as well. I started making this half a year ago with milk, but these large quantities of milk started to give me stomach aches and made me very nauseous, so I steered away from that for a while. I always thought that making it with milk would lead me to a tasteless, disgusting porridge but actually it is not that bad at all! So now I make it with mostly water and a splash of milk to add a bit of creaminess.

1 portion Oatmeal:


Yummy oatmeal with in-season blueberries


175 ml water
4 heaped tablespoons of steal-cut oats
a splash of milk 
a pinch of salt

Toppings:
Toasted almonds, cinnamon, raisins (and a sprinkle of sugar)
Blueberries, desiccated coconut, cinnamon
Banana, Raisins, cinnamon

Heat up the water in a small pan until it starts boiling. Add the oats and let them cook for about 2 minutes, add the sprinkle of salt. When it starts to bubble cohesively and looks a bit gloopy it's perfect. Take it off of the heat and stir in the milk. Leave it for about a minute so that the oats can soak up all of the liquids.

Pour the oatmeal in a bowl and add the toppings. I gave you three of my favorite versions, as you can see I LOVE cinnamon... I can't help it. I also have a bit of a sweet-tooth, so I always add a sprinkle of sugar. Not too much, just a bit to give it a hint of sweetness... I know I should learn to live without... 

I don't always have the time to prepare my oatmeal, so I used to have some regular cereal that I would eat with yoghurt or milk if I had to get out of the house really quickly. But then I found a recipe to make my own granola! Life changer! It is so damn easy, and so tasty, and I really believe it is a healthier option to buying the stuff in the shop! The reason for that is that you can control the amount of sweetness you add, and I prefer to use honey because it is a natural sweetener and I think that makes it a healthier option to some artificial sugars. Make a large batch of this stuff on the weekend and you'll be laughing the rest of the week! I eat it with some yoghurt and some fresh fruit, and I'm a good girl so I don't add any more sweetness to my yoghurt and muesli, at least that is one step forward ;). 

Ingredients:


The result of a saturday morning cooking session, granola with mango
Steal-cut oats (as much as you want...) 
Honey
Sunflower Oil
(egg white)
cinnamon
ground ginger

dried fruits
desiccated coconut
toasted almonds

Preheat your oven to 180 degrees celsius. 
Pour your oats onto a baking tray and add your spices, then start drizzling some honey and some sunflower oil over your oats. You want all of those little oats to be coated in some lovely sweetness and a bit of oil, it should end up looking a bit sticky. If you would start baking this off now you would end up with a granola that has a lot of loose oats (which I like). You can also loosely whip an egg white and add that to the mixture. The egg white will make sure more oats will stick together and you'll end up with some nice crunchy oat-clusters. Yum! 
As with the oatmeal, the toppings really are up to you! Before it goes into the oven add the stuff that needs toasting off as well, such as the coconut and the almonds. Add the dried fruit after the mixture comes out of the oven so that they don't become too tough. 
Bake off the oat-mixture for about half an hour, or even longer. It really depends on how dark you want your granola! Do mix up the mixture on your baking tray every ten minutes so that every oat gets nice and toasty. 
When you're done baking it, take it out of the oven, and let it dry completely on a cool surface. So take it off of the baking tray and let it cool completely until dry. When it comes out of the oven it might feel a bit moist but that will go away within 10 minutes!

Ahhh I'm glad I got that done... I hope it is as nice to read as it was to write! Please let me know what you think about my 'healthier' breakfast options, what toppings you like to add to your oatmeal and also please let me know if you give making your own granola a try! 

Lots of love,
Floor

woensdag 12 februari 2014

What I ate Wednesday

Happy Wednesday everyone!

Oh what a day haha... This week I'm running around town entertaining a group of international students, mostly in the evening. What a culture shock for me! And no I'm not talking about the cultural backgrounds of the members of my international group, I'm talking about the 'being active in the evening'-culture.

As you might have read I had one of those writing-boring-essays-weeks again last week, which was the reason why I locked myself in my room with my laptop and my books once again. The world outside is so real, and cold, and busy. Luckily I have some time today to curl up with a blanket and experience the outside world through my window, safe, inside the house ;). Haha no I'm just kidding, but I am trying to cope with a never ending hangover, it started as an alcohol hangover and it continued with a lack of sleep hangover, do you know what I mean?

On those days I try to be a bit nice to myself, I'm never really strict with what I eat because I believe that if you keep thinking about all those things you can't have you end up wanting them even more, so I allow myself to eat a couple of things I normally wouldn't have.

What I ate Wednesdays are one of those blogger things, and I thought I'd join in to show you that I don't always cook gourmet meals. Good food might make you feel better though so I do choose what I eat carefully! We're only half way through the day though and I haven't had lunch yet, so I'll just describe to you the things I ate yesterday to make myself feel a little bit better while coping with a massive headache:

  • I started with water and a vitamin supplement, I don't always take those, only when I feel like my body needs a bit more... 
  • I was out of bread and I didn't feel like having my normal oatmeal so I had two mini raisin rolls and a cup of tea, if I had had the energy to cook I would have made oatmeal with water and raisins, some cinnamon and toasted almonds. 
  • Then I went back to bed and around 1 I did some groceries, so when I got back I had two pieces of toast, one with hummus and sliced chicken (such a yummy combo) and one piece of toast with nutella (and another cup of tea)
  • As a little snack I had a couple of 'cranchito snax', it's a new thing from Milka chocolate: corn chips (savory) covered in chocolate. It's really good but you can't eat too many of those...
  • For dinner I made something that I wouldn't cook for myself on a regular day, but a friend told me it was the best anti-hangover cure! I wouldn't want to call this a recipe because we stacked a burger and some things on a bun and called it a hamburger but it was an epic one so below this list you'll find the little 'recipe' of my creation. With the hamburger we had a couple of fries and a little salad to keep it on the healthy side! 
Epic hamburger by housemate Peter


1 soft bun
onions
1 hamburger
cheddar
bacon
an egg
lettuce
tomato
curry sauce and mayo

We toasted the buns, caramelized the onions, panfried the bacon, panfried the hamburger, fried an egg, put the cheddar on top of the hamburger, put some sauce on the toasted bun, put onions on top, added lettuce and tomato, added the hamburger, added the bacon, added the egg, top of the bun on top and done! 


The egg yolk should be runny and when you're finished your face should be completely covered in food, that's the only way to eat it, I assure you! But it made me feel so much better that I had enough energy to go out again till 2 in the morning. When I woke up at 7 today I wasn't that pleased, but hey. It's only for one week. I will survive! 

I hope you liked this post, it was a bit out of my comfort zone talking about what I eat during a day but I hope you enjoyed it nonetheless. 

What do you like to eat when you're hungover? Do you prefer savory things or do you get a sweet tooth the day after? Please let me know down in the comments below this post or have a look at my facebook-page or twitter to find other ways to get into contact with me :). 

xxxx Floor


donderdag 6 februari 2014

Study food: comfort food (Spaghetti Bolognese)

Happy thursday everyone!

Oh naughty me... I should be working on a paper on Research Methods, I've only got 300 words to go and it'll be finished but damn it, I need to let out some inspiration first before I can finish this boring paper haha!

Me, not studying, in Barcelona, ahh the good times!


It is one of those weeks again, two paper deadlines and of course I've left it to the last minute to write them, I never seem to learn the trick do I? :P I'm not particularly stressed out either, I just don't want to do it, if I was stressed out I might have spent a little less time on facebook and twitter, but that's not the case for me this time! Still, most of the time this week I've been trying to concentrate on writing my papers and during those weeks I want easy, tasty comfort food. And what's better than making a whole pot full of delicious sauce that is too much for two people so you get to save a little bit for another meal during the week! It always makes me feel so satisfied... not having to think about what I'm going to eat in the evening and not having to do groceries every night of the week!

So last monday I decided to make Spaghetti Bolognese. Multiple reasons for that: it's easy, you can make a large pot, it's super tasty and it contains basic flavors that won't bore you after one night (which is necessary if you're planning to eat something more than once during a week if you ask me). Another personal reason was that my boyfriend thought he didn't like Spaghetti Bolognese, and I'm not bragging when I say this but everybody loves my Spaghetti Bolognese. I stick to a very basic recipe and I'm very keen on only using good products, fresh products, and I don't use any silly supplements.

In the Netherlands there is a commercial on television at the moment of a fake Italian chef who makes Spaghetti Bolognese with this 'powder', I've never really understood people who use powdered food... I've tried it, and when I first started cooking I did use it from time to time but the flavors are so bland and boring... With a couple of herbs, onion and garlic you can get so far and it isn't more difficult than popping a bag of powder in a pan with some water... So if you're one of these people who, out of habit, uses powdered food a lot, do me a favor and promise me to at least try this recipe. I can promise you that it is the easiest thing, you don't need a ridiculous amount of ingredients and you'll feel so satisfied and proud of the dish you've made from scratch!  (The only exception I make is for stock-cubes... It really takes a long time to make stock, and you can get pretty good quality versions of those stock-cubes).

I cooked this on monday and posted a little comment about it on twitter. A fellow blogger called 'perlenmama' commented on my tweet saying that she couldn't wait for the recipe even though I initially wasn't planning on doing a blog post about this week haha, but because she was looking forward to the recipe I decided to share it with you anyway, even though I didn't take a lot of pictures of it!

Spaghetti Bolognese

The final result

Makes 4 portions

a swig of olive oil
500 g of mince meat (half pork half beef)
a couple of slices of bacon, cut into pieces
1 large carrot
2 sticks of celery 
1 small onion
1 clove of garlic
1 tin of tomatoes
half a stock cube
1 small can of tomato concentrate
1/2 tsp of dried rosemary or oregano
25 ml of milk
Spaghetti (or any other type of pasta)
-optional: 100 ml of red wine-

Start by heating your pan and add the olive oil. When the pan and the oil is nice and hot add your bacon and fry that off for a couple of minutes. It doesn't need to be crispy, you just want to get the flavors going. When the bacon is cooked add the minced meat and fry that off until it really is nice and brown and you have some bits sticking to the bottom of your pot! At first, some liquid might seep out of the meat, just leave it on a medium heat so that it can evaporate and your meat can brown, no need to drain it because then you'll lose some of the great flavors!

While the meat is browning cut your vegetables in teeny tiny pieces, when they go in the pot you want them to almost melt in the sauce, Bolognese is not a sauce that's all about the vegetables (I feel a lot of students make this mistake...). The vegetables give the sauce it's flavor and sweetness but you'll need to prepare some vegetables on the side with this dish to make it a healthy one! When that's done add everything to the pan and make sure all of those little veggies go soft and yummy and release all of their sweet flavor.

When the meat is yummy looking brown, add the wine if you are using it. You want to use it to get the brown tasty bits off of the bottom of the pan and melt into the wine-sauce that you're making. The alcohol should evaporate immediately and you should be left with a wonderfully smelling kitchen! Then add your can of tinned tomatoes and stir it in. 

Now make a cup of stock-tomato tea: get a large mug, add half the stock cube and the tomato concentrate and some boiling water. Stir everything so that it starts to look like a strange tomato-soup and then add it to the pan! This is actually the first time I'm flavoring anything, the stock-cube will add some saltiness and the tomato concentrate with some acidity. 

As a last step add your dried herbs and spices (either the rosemary or the oregano, I used rosemary just because... I love the smell, sometimes I prefer oregano). Also add some pepper and some salt to taste: TO TASTE, that means that you should grab a spoon and taste what you've got so far! 

What is left to do is leave it for about an hour. Put the heat on low, you don't want it to 'boil', you want it to 'simmer' lightly. This is probably the most difficult part for anyone starting to learn how to cook: things get better over time! Thats not only the case for cheese and wine, but definitely for sauces as well. You want all of the flavors to marry and become one big family in a pot. 

After that hour (or 45 minutes if you really can't wait) add a tiny bit of milk to taste. In the ingredients list I said '25 ml' but that's just an estimation. The milk helps to correct the sharp tastes if there are any, this Bolognese sauce is all about the round and soft flavors. So grab a spoon and give it a taste, does it need that bit of milk? Does it need a bit more salt, some more pepper perhaps?  

During this last stage you should have also cooked your pasta according to the directions on the package. It usually takes about 10 minutes or a bit less for pasta to be done. 

Serve with some parmesan cheese and a green salad on the side then it should look something like the picture at the top of this article! 


I hope you enjoyed this post :) I feel it was very chatty in comparison to what I usually do haha. Please give the recipe a try and leave me a comment if you liked it! Also check out my twitter and my facebook page if you want to get in touch! (The last couple of days I've had loads of people from the philippines like my facebook page haha, hey everyone, I don't know how you found my page but I'm hoping you like the things that I put on there!)

xxx
Floor


maandag 3 februari 2014

Cheer up recipe: Scones

Happy monday everyone!

Have you survived your weekend? Did you manage to drag your but out of bed this morning? I know I had some issues this morning... I still had to do all these boring house chores and find time to finish writing a paper, so very boring...

But I have the best way to help you cheer up! It takes you half an hour in total and you instantly feel a lot better! Have one of these scones in the afternoon with some tea and take some time to feel proud of all those boring things you ticked off your to-do list! (On top of that, the amount of sugar and butter that goes into these delights is, if you ask me, very limited, so you don't have to feel guilty for having a treat). If you don't get the monday blues you could also bake these scones for a friend, it's always nice to help someone else feel better ;).

I made these with one of my best friends a little while ago when we had our own little tea-party. We don't get to see each other very often so we always need a lot of time to catch up when we do, so I made these scones and she made some lovely sandwiches! A couple of days later I saw a video of Fleur de Force who had filmed the making of her own tea-party with one of her friends, such a funny coincidence! You can watch the video below if you'd like :). But she made fairy cakes and I really prefer scones :) (or maybe she doesn't have a good recipe for scones... Maybe I should send her this link haha...). Anyway, it is a good thing to make for yourself, but even better to share with friends, as goes for all baking I guess!


Buttermilk Scones


makes: 10 scones

450 g of selfraising flour
1/4 tsp of salt
100g of cold diced butter
85g of sugar
284ml of buttermilk (Dutch: Karnemelk)
2 tsp of vanilla extract
a splash of milk or a beaten egg

I've tried a number of different recipes but I discovered this one recently and it is definitely the easiest one I've come across and (if you have all of the right ingredients) it is a real no-brainer!

Start with pre-heating your oven to 200 degrees Celcius.

Add the diced butter to your self-raising flour, make sure it is self-raising, I forgot to do this last night and my first batch was a total failure haha. In case you don't have self-raising flour you could just take normal flour and add 1 tsp of baking powder for every 100 g of flour. 

Add the butter to the self-raising flour

Using only the tips of your fingers, rub the butter into the flour until you get a sandy texture. It is important to only use the tips of your fingers because that will ensure that you don't melt the butter with the warmth of your hands. If you've done it right the mixture should a little bit like this: 

Butter and flour mixed together
Now add in the sugar and the salt and mix it a bit more with your finger tips. After doing this take a cup and mix the vanilla extract with the buttermilk. Put the cup in the microwave for half a minute on medium heat, you don't want it to become 'hot' but you slightly want to heat it up. 

Vanilla + buttermilk

Now take a separate bowl and add a bit of the flour mixture to the bowl, add a bit of the vanilla and buttermilk and mix it together either with your hands or with a spoon. Keep repeating the process until everything is more or less mixed together. 

Mix the wet and the dry ingredients together

Make sure you don't over mix it! So when everything is almost combined, turn the bowl over on a clean work-surface dusted with some flour and slowly use your hands to really bring everything together (you want to use all of those ingredients, don't leave anything behind!). 

Finish it off with a bit of kneading to make a dough

You now want to flatten the dough a bit, it should look like a really thick cookie, about two fingers high. Then use a round cookie cutter or a small glass to cut out little rounds. 
Put the rounds on a baking tray lined with baking paper and glaze the scones with some beaten egg or some milk to give them a nice brown color. If you have the feeling your dough is not really cohesive and it is a bit flaky, don't worry, you've done well! 

Put a bit of milk or egg on top of the scones

Bake the scones for about 15 minutes or until you feel satisfied with the way they look, some ovens work a bit different than others :). This is the way they should look when you take them out of the oven:

Nice golden brown little scones

They're best when they are still warm and with a bit of clotted cream and jam or lemon curd! In the first picture you see I also have dried apricots lined up, and that is what I sometimes like to do: add some raisins, some dried diced apricots, maybe some lemon peel and poppy seeds... whatever you like! But this is a really good basic recipe, at least: it's the best one I've tried! 

So give it a go and let me know how they turned out! Or some other suggestions you have for added flavourings for scones, or what you like to eat your scones with (a cup of coffee, cup of tea?). And do you have any other way to cheer yourself or your friends up? Let me know! You can send me a facebook message, a tweet, an instagram, or a comment, whatever you like :) 

xxxx 
Floor


zondag 19 januari 2014

Earl-grey honey madeleines on a sunny Saturday

Hey everyone! How are you? Did you have a nice and sunny sunday? I don't know whats up with the weather in the Netherlands, but it was so sunny here this weekend, I almost thought it was spring already. Cray-cray and I'm loving it!

Sunny view in the living room

I've been eyeing this recipe for green tea madeleines by Sorted Food for a little while now, the flavors really intrigued me and I loved the idea of small, portioned and light cakes! So when my mom treated me to a madeleine pan I knew what I wanted to make. Unfortunately I didn't have the ingredients to give my madeleines the green tea twist, so I went for a culture clash theme: delicate French madeleines with traditional English flavors! The result was sooooo yummy, and they look so cute on a pretty plate or cake standard, how could anyone resist?


Earl-grey honey madeleines

3 bags of traditional English tea or Earl grey
3 tbsp of boiling water
3 tbsp of melted butter

2 eggs
1/3 cup of sugar
2 tbsp of honey
2 tsp of vanilla
1/2 tsp grated lemon peel
3/4 cup of flour
1/2 tsp baking powder
Pinch of salt


Start with steeping your tea in the three tablespoons of water, over the cup you're making your super strong tea in! Leave it for 30 minutes and then add the tea to your melted butter untill you see something like this:

Melted butter with very strong tea
Mix your eggs with the sugar for about four minutes or untill you're left with a pale and foamy mixture, then add your flavourings: the honey, vanilla and lemon peel and let it mix for another minute. Then sift in your dry ingredients and slowly with a spatula fold the dry ingredients in and after that do the same with your melted butter / tea. Be very gentle because you don't want to beat out any of the air!

Sifting flour, salt and baking powder
The finished batter
Put clingfilm on the surface of your batter and chill it for at least 3 hours. After that the batter will seriously look like a mousse, so if you pull off the cling film and you see all of the air bubbles you know you've done well! 

Butter and flour your madeleine pan, preheat your oven to 200C and then carefully heap tablespoons of the batter in the madeleine shapes. You don't need to fill them completely, the mixture will rize a bit! 

Madeleine pan


Leave them in the oven for 10 minutes and I can recommend you to stare at them while they're cooking, I can promise you they won't freak out ;).


When they're done they are light and yummy and perfect with a cup of tea, especially when they are sprinkled with icing sugar!

Give them a go and let me know what you think, or please leave me a comment on my facebook page or in the comments below if you have any other flavor combination!

Lots of love,
Floor


Hyper Smash


zondag 12 januari 2014

A weekends treat: Chocolate-caramel fudgy brownies

Happy Sunday everyone!

Hows your weekend? Did you have any fun activities planned, or did you just lounge around the house and enjoy some quiet time? My weekend has had a bit of both: on Saturday is spent the whole day in Groningen, which is the largest most northern city in the Netherlands. I went there on an excursion organized by ESN, and if you've been reading my blog for a while you know that I am on its culture committee and that we organize these excursions a couple of times a year. Groningen is beautiful but the weather was a bit of a disappointment, at least the first half of the day. The second half ended up being quite sunny but by 4 pm I was on the train to Nijmegen for a dinner party at one of my best friends house. All in all a very fun day that was concluded quite late when I was back at home in my cozy bed.

This morning I didn't have to rush so I enjoyed that cozy bed a bit longer than necessary, wasting my time, watching YouTube video's as always haha. In the afternoon I had to go into town and the weather was surprisingly beautiful, it almost seems like spring is in the air... but that can't be, right? I had the sun in my face when I walked into the inner city of Utrecht and treated myself to a cup of coffee. On my way back I did some grocery shopping and by accident I ended up with all the ingredients for brownies... Oops! :D Now let's hope there'll be enough people to help me with eating it...

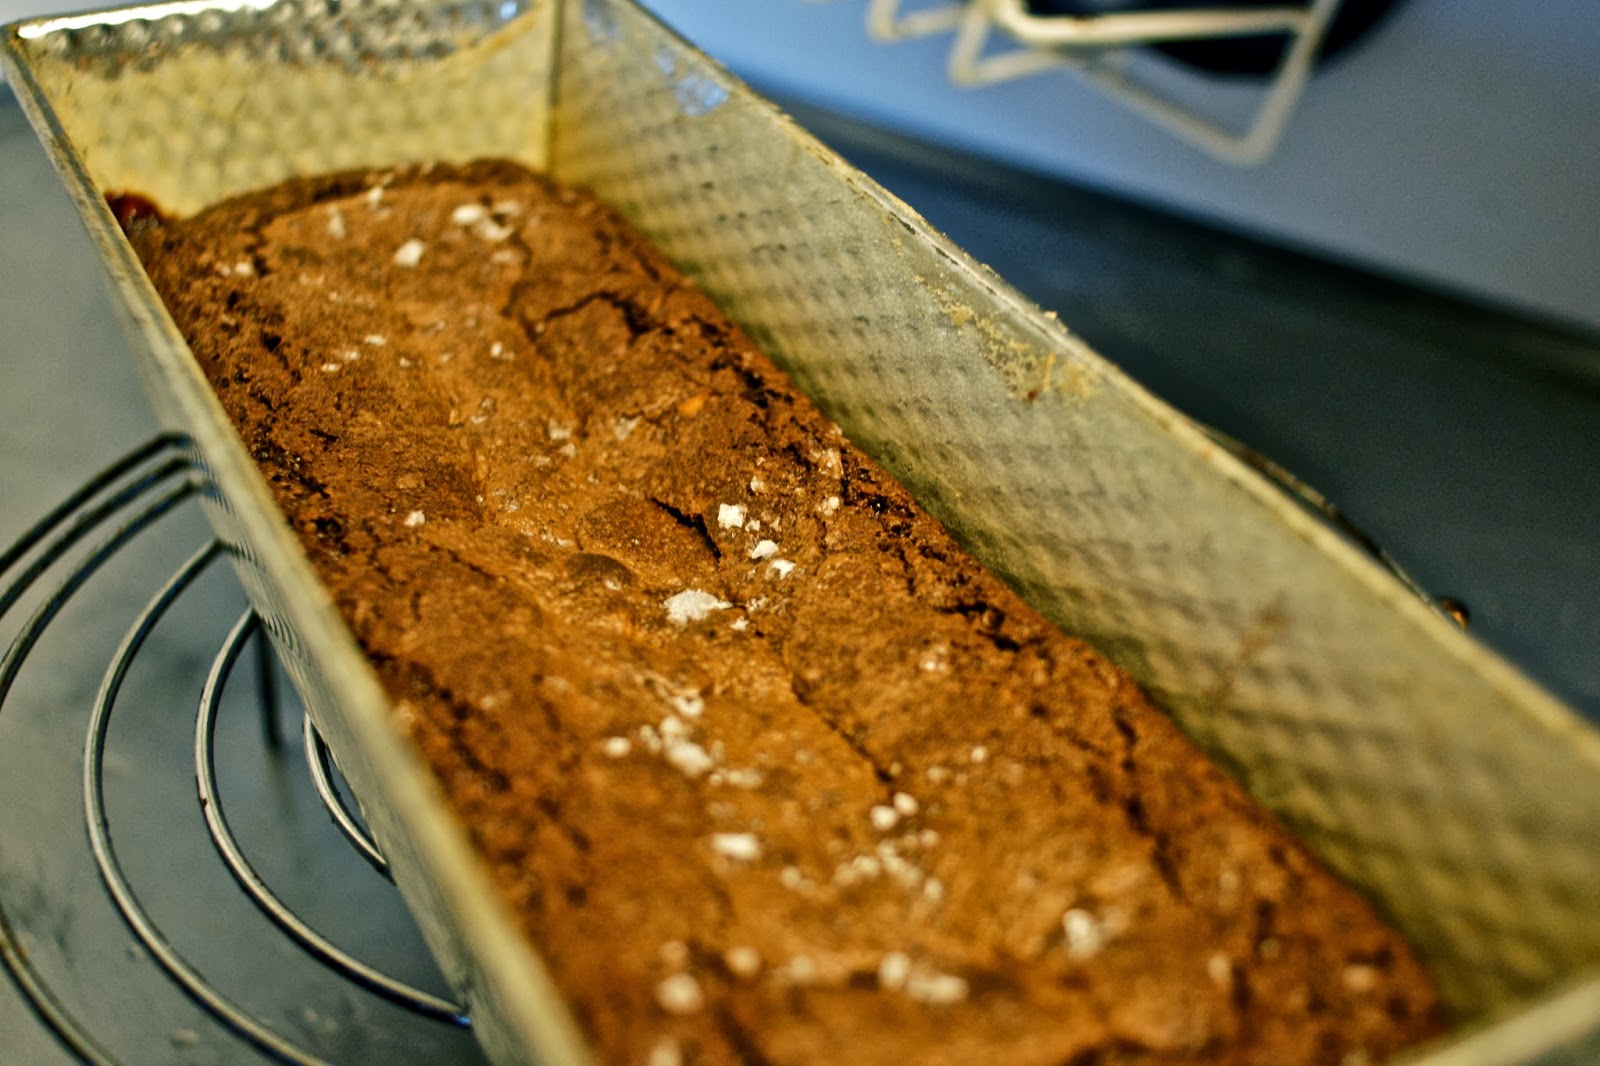
The recipe is one of my all time favorites, I found it in the Better Homes and Gardens cookbook and I've been using it for literally YEARS. You end up with deliciously fudgy brownies and they're horrible when you were planning to loose some weight. The recipe is also very basic, so it allows you to add some other ingredients to make it a bit more special. This time I chose to add caramel and sea-salt flakes, but you could also add chocolate chips, chopped nuts, dried fruit, mini marshmellows... basically anything! I think everyone should have a brownie recipe on hand, so that is why I'm giving you my special one, I hope you enjoy it!

Chocolate-caramel fudgy brownies


Ingredients: 

125 g of butter
100 g of chocolate
2/3 cup of sugar
2 eggs
1 tsp of vanilla
2/3 cup of flour
1/4 tsp of baking soda
a pinch of salt

and I added

1 tbsp of Cocoa
a handful of caramel fudge
a sprinkle of sea-salt flakes


Start with pre-heating your oven on 180 C. Grab all of your ingredients, one large bowl that is heat-resistant, a pot with boiling water, a wooden spoon, a chopping board, a knife and a cake tin. 
Put the glass bowl over the pot of boiling water, break the chocolate in small pieces and add it to the bowl together with the butter. Make sure everything is almost completely melted and then take it off of the heat.Add in the sugar and it cool down for a bit. After that add in the eggs one at a time


Mix all of the dry ingredients together (the flour, the baking soda, the salt, and the cocoa) and add it to your liquid mixture. 


When you've reached this stage you've finished the basic recipe. After this step I chopped up some of the caramel fudge and I added it to the mixture. 


Put everything in your greased and floured cake tin and sprinkle it with some sea-salt flakes. Then put it in the oven for at least half an hour if you're using a real brownie tin. I used a cake tin, which gave me some thicker brownies, but I had to cook it for about 15 minutes more. 


And then comes the most difficult process: waiting. I'm always way too excited to get my brownies out of my tin, so I try to wait at least 15 minutes before turning the cake tin over, but really you should give it a bit more time... My brownie crashed and the bottom looks horrible haha, still it tastes really nice and especially the sea-salt gives it another dimension.

So guys, I hope you enjoyed this recipe, give it a try and let me know what you think, or tell me in the comments below what your favorite brownie recipe is! Enjoy the last bit of your weekend and have a great start of the week tomorrow!

Lots of love,
Floor


vrijdag 3 januari 2014

New years resolutions & my first home made butternut squash ravioli!

Happy 2014 everyone!

How was your christmas? And your new years eve? And all the other reasons to eat too much food and have too much to drink! I hope you had a great time and enjoyed everything you did (and ate), because I sure did haha. First christmas day a dinner at a nice restaurant with my boyfriends family, second christmas day (it's a Dutch thing, don't ask) a Indonesian dinner cooked by my parents and the days after that all the left overs of the pies my mother baked, can you believe that there are STILL left overs?!

New years eve was a lot of fun too, I spent it with my boyfriend and his friends. An evening filled with music, dancing, too much food, too much to drink and too little sleep. For some reason however I take very little pictures these days... I have a very nice camera but I always forget to take it places... So that is my first new year resolution: take more (good quality) pictures.

Fun on the train to Liege (Belgium)

My second new years resolution has something to do with all of that food I ate over the last two weeks. I'm all for eating. But I'm also all for looking good, that is why I am going to work hard to be more practical about cooking and to cook more and healthy.

I can imagine you wondering how all of those things add up, so let me explain that to you: I don't always have the time to eat, which results in me eating something simple which is not very good for me. On other days however I have more time to cook and do groceries, so I'm planning to just (ha-ha) plan ahead, do more groceries at once, cook more for a couple of days ahead so that I can enjoy more healthy home cooked meals. Oh and I'll have to cycle more so that I'll burn that extra weight that I might have gained.

I started this resolution quite good today. My parents where out so I had their kitchen all to myself and I decided to make butternut squash ravioli. I got the idea while I was strolling over the market in my hometown with Joost when I saw some delicious looking butternut squash and sage, so I bought all of the ingredients that I thought would fit well together and then when I looked it up on the internet I discovered that SortedFood had already done a similar recipe, so if you want to see a youtube video about this recipe you can check it out here:


I adapted this recipe a little bit, but I used their recipe for pasta. It ended up tasting wonderful, and soooo filling! It is a little bit time consuming, but it was the first time I made it so I hope it'll take me less time the next time I make pasta. To give you some inspiration, here is the recipe for my butternut squash ravioli with goatscheese and sage. 

Butternut squash ravioli with goats cheese and sage


1 butternut squash (diced)
1 red onion
1 clove of garlic
1 large handful of sage
fresh goats cheese
olive oil
salt
pepper

250g of pasta flour (00 type)
3 eggs
a pinch of salt


I started with roasting off the cubes of squash with some olive oil and a bit of the sage. I put the oven on 200 degrees Celsius and left the squash in there for about half an hour or until everything is soft, and a little bit darker of color. 


While the squash is in the oven dice the red onion and sweat it off in a pan with some olive oil, then add the garlic and the rest of the sage. When the squash is ready, mix it with the red onion, add salt and pepper, squash and mash it until it is almost a smooth mixture and then let it cool down.
It doesn't take long to sweat down the onion and the garlic so when the butternut squash is still in the oven, make the pasta dough. Put the flour in a bowl and make a little well in it. In this well I added the three eggs and a pinch of salt. I mixed everything together with a fork until it had a crumbly texture and then I put it on a clean surface to knead the dough. I did that for about 5 minutes until I had a nice and elastic dough. Leave the dough for about 15 minutes.

Make sure to use type 00 flour!
This is the moment when I got out my parents' pasta machine and my little brother. I think it is possible to roll out the pasta by yourself but it definitely goes faster with the help of someone else. I separated the dough into smaller pieces and started to work them trough the machine, first on the first setting, then I folded over the dough a couple of times and kept putting the dough through the first setting and then I went on through the settings until I reached setting 8 on my pasta machine. 

You can also make some linguine if you made too much dough! :)

When you have your thin sheets of pasta you make sure you have two sheets ready to go (either you make two or you cut one long piece in two, that's what i did). I put a lot of flour on the bottom of the bottom sheet to make sure it wouldn't stick to my surface, and then I brushed the top of this bottom layer with milk. I then started to spoon my squash mixture with teaspoons on the bottom layer, to every heap I added a little bit of goats cheese and then carefully I added the top layer of pasta. When you do this you have to make sure there are no air-bubbles between your bottom and top sheet, because that would cause your ravioli to explode when you try to cook them. After I covered them I cut little shapes with a pasta cutter and I made sure all edges were sealed. 


I cooked them off in a pot of salted water for about 3 minutes, and I served them with a simple tomato sauce and some more goats cheese. It was very very very yummy and really not that difficult to make! You could very easily make a large batch and freeze a lot of this stuff for later in the week (that's what I did!). 


Yummy home cooked deals every day of the week! YES!

I hope you enjoyed this post and this recipe. Please let me know what awefully yummy things you ate over the holidays and whether you have any similar new years resolutions and how you are planning to stick to them, I'd really love to hear it! 

Lots of love,
Floor