Posts tonen met het label Weekend. Alle posts tonen

maandag 3 februari 2014

Cheer up recipe: Scones

Happy monday everyone!

Have you survived your weekend? Did you manage to drag your but out of bed this morning? I know I had some issues this morning... I still had to do all these boring house chores and find time to finish writing a paper, so very boring...

But I have the best way to help you cheer up! It takes you half an hour in total and you instantly feel a lot better! Have one of these scones in the afternoon with some tea and take some time to feel proud of all those boring things you ticked off your to-do list! (On top of that, the amount of sugar and butter that goes into these delights is, if you ask me, very limited, so you don't have to feel guilty for having a treat). If you don't get the monday blues you could also bake these scones for a friend, it's always nice to help someone else feel better ;).

I made these with one of my best friends a little while ago when we had our own little tea-party. We don't get to see each other very often so we always need a lot of time to catch up when we do, so I made these scones and she made some lovely sandwiches! A couple of days later I saw a video of Fleur de Force who had filmed the making of her own tea-party with one of her friends, such a funny coincidence! You can watch the video below if you'd like :). But she made fairy cakes and I really prefer scones :) (or maybe she doesn't have a good recipe for scones... Maybe I should send her this link haha...). Anyway, it is a good thing to make for yourself, but even better to share with friends, as goes for all baking I guess!


Buttermilk Scones


makes: 10 scones

450 g of selfraising flour
1/4 tsp of salt
100g of cold diced butter
85g of sugar
284ml of buttermilk (Dutch: Karnemelk)
2 tsp of vanilla extract
a splash of milk or a beaten egg

I've tried a number of different recipes but I discovered this one recently and it is definitely the easiest one I've come across and (if you have all of the right ingredients) it is a real no-brainer!

Start with pre-heating your oven to 200 degrees Celcius.

Add the diced butter to your self-raising flour, make sure it is self-raising, I forgot to do this last night and my first batch was a total failure haha. In case you don't have self-raising flour you could just take normal flour and add 1 tsp of baking powder for every 100 g of flour. 

Add the butter to the self-raising flour

Using only the tips of your fingers, rub the butter into the flour until you get a sandy texture. It is important to only use the tips of your fingers because that will ensure that you don't melt the butter with the warmth of your hands. If you've done it right the mixture should a little bit like this: 

Butter and flour mixed together
Now add in the sugar and the salt and mix it a bit more with your finger tips. After doing this take a cup and mix the vanilla extract with the buttermilk. Put the cup in the microwave for half a minute on medium heat, you don't want it to become 'hot' but you slightly want to heat it up. 

Vanilla + buttermilk

Now take a separate bowl and add a bit of the flour mixture to the bowl, add a bit of the vanilla and buttermilk and mix it together either with your hands or with a spoon. Keep repeating the process until everything is more or less mixed together. 

Mix the wet and the dry ingredients together

Make sure you don't over mix it! So when everything is almost combined, turn the bowl over on a clean work-surface dusted with some flour and slowly use your hands to really bring everything together (you want to use all of those ingredients, don't leave anything behind!). 

Finish it off with a bit of kneading to make a dough

You now want to flatten the dough a bit, it should look like a really thick cookie, about two fingers high. Then use a round cookie cutter or a small glass to cut out little rounds. 
Put the rounds on a baking tray lined with baking paper and glaze the scones with some beaten egg or some milk to give them a nice brown color. If you have the feeling your dough is not really cohesive and it is a bit flaky, don't worry, you've done well! 

Put a bit of milk or egg on top of the scones

Bake the scones for about 15 minutes or until you feel satisfied with the way they look, some ovens work a bit different than others :). This is the way they should look when you take them out of the oven:

Nice golden brown little scones

They're best when they are still warm and with a bit of clotted cream and jam or lemon curd! In the first picture you see I also have dried apricots lined up, and that is what I sometimes like to do: add some raisins, some dried diced apricots, maybe some lemon peel and poppy seeds... whatever you like! But this is a really good basic recipe, at least: it's the best one I've tried! 

So give it a go and let me know how they turned out! Or some other suggestions you have for added flavourings for scones, or what you like to eat your scones with (a cup of coffee, cup of tea?). And do you have any other way to cheer yourself or your friends up? Let me know! You can send me a facebook message, a tweet, an instagram, or a comment, whatever you like :) 

xxxx 
Floor


zondag 12 januari 2014

A weekends treat: Chocolate-caramel fudgy brownies

Happy Sunday everyone!

Hows your weekend? Did you have any fun activities planned, or did you just lounge around the house and enjoy some quiet time? My weekend has had a bit of both: on Saturday is spent the whole day in Groningen, which is the largest most northern city in the Netherlands. I went there on an excursion organized by ESN, and if you've been reading my blog for a while you know that I am on its culture committee and that we organize these excursions a couple of times a year. Groningen is beautiful but the weather was a bit of a disappointment, at least the first half of the day. The second half ended up being quite sunny but by 4 pm I was on the train to Nijmegen for a dinner party at one of my best friends house. All in all a very fun day that was concluded quite late when I was back at home in my cozy bed.

This morning I didn't have to rush so I enjoyed that cozy bed a bit longer than necessary, wasting my time, watching YouTube video's as always haha. In the afternoon I had to go into town and the weather was surprisingly beautiful, it almost seems like spring is in the air... but that can't be, right? I had the sun in my face when I walked into the inner city of Utrecht and treated myself to a cup of coffee. On my way back I did some grocery shopping and by accident I ended up with all the ingredients for brownies... Oops! :D Now let's hope there'll be enough people to help me with eating it...

The recipe is one of my all time favorites, I found it in the Better Homes and Gardens cookbook and I've been using it for literally YEARS. You end up with deliciously fudgy brownies and they're horrible when you were planning to loose some weight. The recipe is also very basic, so it allows you to add some other ingredients to make it a bit more special. This time I chose to add caramel and sea-salt flakes, but you could also add chocolate chips, chopped nuts, dried fruit, mini marshmellows... basically anything! I think everyone should have a brownie recipe on hand, so that is why I'm giving you my special one, I hope you enjoy it!

Chocolate-caramel fudgy brownies


Ingredients: 

125 g of butter
100 g of chocolate
2/3 cup of sugar
2 eggs
1 tsp of vanilla
2/3 cup of flour
1/4 tsp of baking soda
a pinch of salt

and I added

1 tbsp of Cocoa
a handful of caramel fudge
a sprinkle of sea-salt flakes


Start with pre-heating your oven on 180 C. Grab all of your ingredients, one large bowl that is heat-resistant, a pot with boiling water, a wooden spoon, a chopping board, a knife and a cake tin. 
Put the glass bowl over the pot of boiling water, break the chocolate in small pieces and add it to the bowl together with the butter. Make sure everything is almost completely melted and then take it off of the heat.Add in the sugar and it cool down for a bit. After that add in the eggs one at a time


Mix all of the dry ingredients together (the flour, the baking soda, the salt, and the cocoa) and add it to your liquid mixture. 


When you've reached this stage you've finished the basic recipe. After this step I chopped up some of the caramel fudge and I added it to the mixture. 


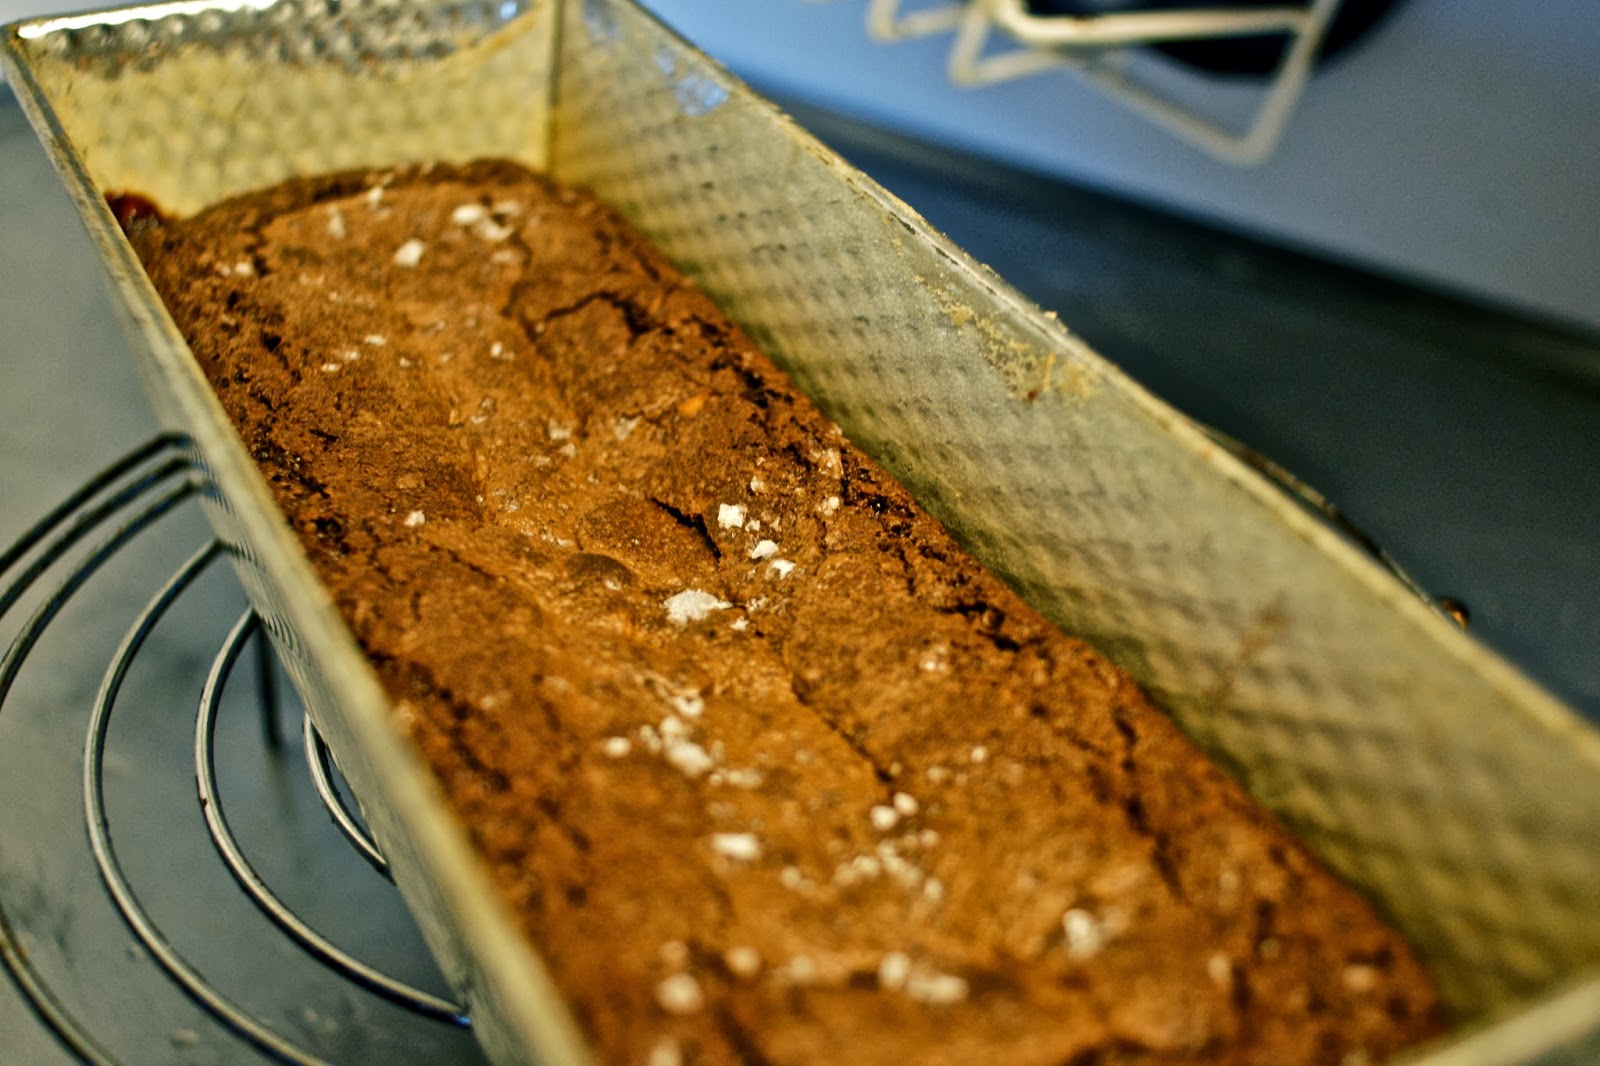
Put everything in your greased and floured cake tin and sprinkle it with some sea-salt flakes. Then put it in the oven for at least half an hour if you're using a real brownie tin. I used a cake tin, which gave me some thicker brownies, but I had to cook it for about 15 minutes more. 


And then comes the most difficult process: waiting. I'm always way too excited to get my brownies out of my tin, so I try to wait at least 15 minutes before turning the cake tin over, but really you should give it a bit more time... My brownie crashed and the bottom looks horrible haha, still it tastes really nice and especially the sea-salt gives it another dimension.

So guys, I hope you enjoyed this recipe, give it a try and let me know what you think, or tell me in the comments below what your favorite brownie recipe is! Enjoy the last bit of your weekend and have a great start of the week tomorrow!

Lots of love,
Floor


zaterdag 9 november 2013

Birthday entertaining (+recipes)

Happy Saturday everyone!

How's your weekend so far? Mine started yesterday already and I've been having a great time! Tomorrow it's my birthday, so I used the opportunity to throw a little birthday party yesterday evening. I had been working on an assignment until 1 the night before so I tried to sleep in on friday morning, but at 9.30 am I was too excited to start baking and cooking that I got up and started my chores.

I expected around 20 of my friends to come of which two of them would stay for dinner so I wanted to bake two types of cake. I was looking for some crowd-pleasers, at least one of my favorites and I had to take into account that I was baking on a budget. It was a long and hard thought process, but in the end I settled for a banana bread and Jamie Oliver's 'Children's Party Cake'. I've made the banana bread a coupe of weeks before and it was a real crowd pleaser and the Party Cake is one of my favorites, it has a lot of chocolate, fruit and whipped cream, everything you want in a cake ;). You'll find the recipes below!

The party was a huge success, at least that is what I thought. Everyone loved the cakes, I got many awesome and very thoughtful gifts, we danced a little, laughed a lot and at 2 am I was in my bed. Exhausted but sooo happy because I got to see so many friends!

Wearing my new scarf!

If you ever find yourself in need of a good recipe for a cake either one of the two posted below are great options. The banana bread is a lot quicker to make if you're short on time, but the chocolate party cake is a real party favorite!

Jamie Oliver's Chocolate Children's Party Cake

I started with the Chocolate cake because that had to cool down before I could cut it in half, cover it in whipped cream and oranges. In his recipe Jamie tells your to use two separate cake tins but I have a teeny tiny oven and it would take way too long to bake two cakes.

You need: 
200 g butter (at room temperature)
4 tbs of cocoa powder
3 oranges
200 g of sugar (as fine as possible)
3 eggs
1 tsp of baking powder
1/4 tsp of salt
200 g of self-raising powder
200 ml of cream
100 g butter for the icing
100 g of pure chocolate
100 g (or less) icing sugar

Preheat the oven on 180C degrees. 
Cream the butter and the sugar in a bowl, if you've made sure that your butter is soft enough that should be fairly easy to do. Mix the cocoa powder with 4 tbs of hot water and add the mix to your butter/sugar mixture. Add the eggs one by one and add the zest of 2 of your oranges. Mix together the dry ingredients and start adding them to your wet mixture, make sure not to over-mix it but it should be a nice and creamy cake consistence. Now this is very important: try not to eat all of the mixture. I know, it tastes great, but you should have enough left to fill a round cake tin for at least 1/3 of the height. Before you add the mixture to your cake tin grease your cake tin properly and put a piece of baking paper on the bottom. Bake the cake for 40 minutes or until a when you test the center of the cake with a skewer and it comes out clean.

Let your cake cool down for about 40 minutes.
In the meantime you can make a banana bread ;) (That's what I did). 
Whilst cooling down, add the chocolate, butter and sugar in a glass bowl over a pan of boiling water. It'll look incredible, but again, try not to eat it all... 

Try to eat not all of the chocolate icing... 
Once it has cooled down, carefully cut your cake in half, whip your cream until you reach stiff peaks, segment the two oranges you used for the zest and add the cream and the segmented oranges to the bottom half of your cake. Press the top half of your cake on top and drizzle it with the chocolate mixture. Let your cake cool down in the fridge for about half an hour and then it is ready to eat! 
The chocolate cake, cut in half
Cover it in cream and segmented orange

The best banana loaf ever!

250 g of flour
2 tsp of baking powder
1 tsp of cinnamon
1/4 tsp of salt
100 g of butter
200 g of white muscavado sugar
1 tsp of vanilla
2 eggs
1 cup of creme fraiche (125 ml)
3 bananas, mashed
100 g of pure chocolate, cut into pieces
(optional: some nutes, pistachios or walnuts and some brown sugar)


Here comes the easiest recipe ever: 
Preheat the oven on 180c degrees.
Cream the butter and the white muscavado sugar, add the eggs, the vanilla and the creme fraiche. Mix the dry ingredients and add the dry ingredients to the wet ingredients spoonful by spoonful (otherwise you get a flour explosion in your face). Add the mashed bananas and the chocolate and mix. Pour it in your bake-tin that you have lined with baking paper (to understand how to do it look at my picture below, it has proved to be my personal miracle to get out my cakes in one piece). If you'd like you can add the brown sugar and the nuts on top to create a little caramelly-top. Bake your cake for 60 minutes (in the middle of the oven if you have different settings, I don't, as I said, my oven is tiny haha). Let the cake cool down for 20 minutes and remove it from the cake tin!

Banana loaf batter


The cooked banana loaf

All in all it was a great day, I love taking the time to bake and it's even better if I don't have to eat it all myself haha! I hope I've inspired you with these recipes and let me know down below in the comments what your favorite birthday cake is!

Thanks for reading! 
xxxx
Floor


maandag 21 oktober 2013

Work hard, play hard!

So here I am: monday night, quarter to eight in the evening, in my bed wearing PJ's...What a difference from the last couple of nights!
I've mentioned it before but I am part of a committee that organizes cultural activities for international students in Utrecht (the Netherlands). Twice a year we organize a complete weekend in contrast to the usual day-trips. Last weekend was one of those weekends and we went to my birth-region: a weekend filled with doing dishes, running around, counting people, getting on and off the bus and a serious lack of sleep! None of these things sound particular nice, but we had a lot of fun as well! Some highlights were the dinner organized by a caterer (at least for me... I love good food, especially in enormous amounts) and the visit to a local brewery. We stayed at a large farm transformed into a group accommodation located on the southern-Dutch country side of which you can see a picture below.


But all of this has its consequences, I woke up this morning sooo tired that I slept through my alarm (and believe me, that never happens), my whole body was aching: ears, head, body, everything. That was to be expected, but the sad thing is I have two exams this week... so cross your fingers for me! 

When you're ill you have to eat soup, not only because it's good for you but also because I really couldn't bring myself to cooking anything else. So I made my favorite: zucchini/courgette soup. I hope you are feeling well, but if there ever is a moment when you're not feeling so well I can advise you to make this soup:

Zucchini Soup
for 4 people:
2 zucchini's
2 small onions
2 cloves of garlic
750 ml of water
1,5 stock cube
1 tbs of boursin
a little bit of butter or olive oil
1 tsp of dried parsley
0,5 tsp of dried thyme

Chop the onion and the garlic really fine, when your large pan is hot, add your butter or oil and start to sweat off your onions. When the onions are starting to get soft add the garlic. Chop your zucchini's in small pieces and add them to the pan. Let them cook for about 15 minutes or until all of the zucchini's are nice, soft and a little bit mushy. Add the parsley and the thyme and then add the water and the stock cubes. If I had the time I would make my own stock, but when I'm ill I don't even want to bother, I just want some soup :P. I let the soup bubble away for 15 more minutes and then I wizz it up with a hand-held blender (in Dutch: staafmixer, honestly the word blender is not a good translation google!). Then I add the boursin and I wizz it up once again. 

Pour it into a nice floral bowl or any other bowl that makes you happy, serve with breadsticks or crackers!

Pfff okay... I'm just going to read one more article and then I'm going to sleep. Give the recipe a try and leave me a comment if you'd like seeing some more recipes on my blog! 

Thanks for reading!
byeeee 
xoxo Floor


maandag 7 oktober 2013

Soooo many laughs!

The name of my blog was meant to be somewhat inspirational. Promoting appreciation for the small things in life. This does not mean that I have completely mastered the technique, though I have my moments where I suddenly realize how much fun I've been having. My life has been quite hectic lately, I started a new masters degree, do 'volunteer work' (don't know whether it should be called that way, it's a loooot of fun!) for Erasmus Student Network and I work on freelance basis here and there. That compared with a lot of assignments gives me quite a lot of stress. My weekends get blurred with deadlines and when I'm at my parents place in my hometown I hardly get out of the door, however looking through my photos from last weekend made me realize I actually had a lot of fun too, that's why I'd like some photos with you :).

Me and my boyfriend at one of my best friends party haha

My mom thought I need to start meditating, and according to her knitting is almost like meditating so she helped me get started again hehe. It's addicting though... I was so bored on the train yesterday that I had to knit a couple of rows (thats knitting-lingo for you)

Funny boyfriend went to the fair and bought me some candy haha. 

Other things I love to do is hang around on YouTube watching funny videos, my favorite from this weekend was Sprinkle of Glitter's video with her little daughter, so cute! If you're in need of a smile you should definitely watch it :) 


Its just these random things that make life so much fun :), I hope you enjoyed your weekend too, and if you'd like: please share your best moments from this weekend in the comments below, I'd love to read them! 

xoxo